
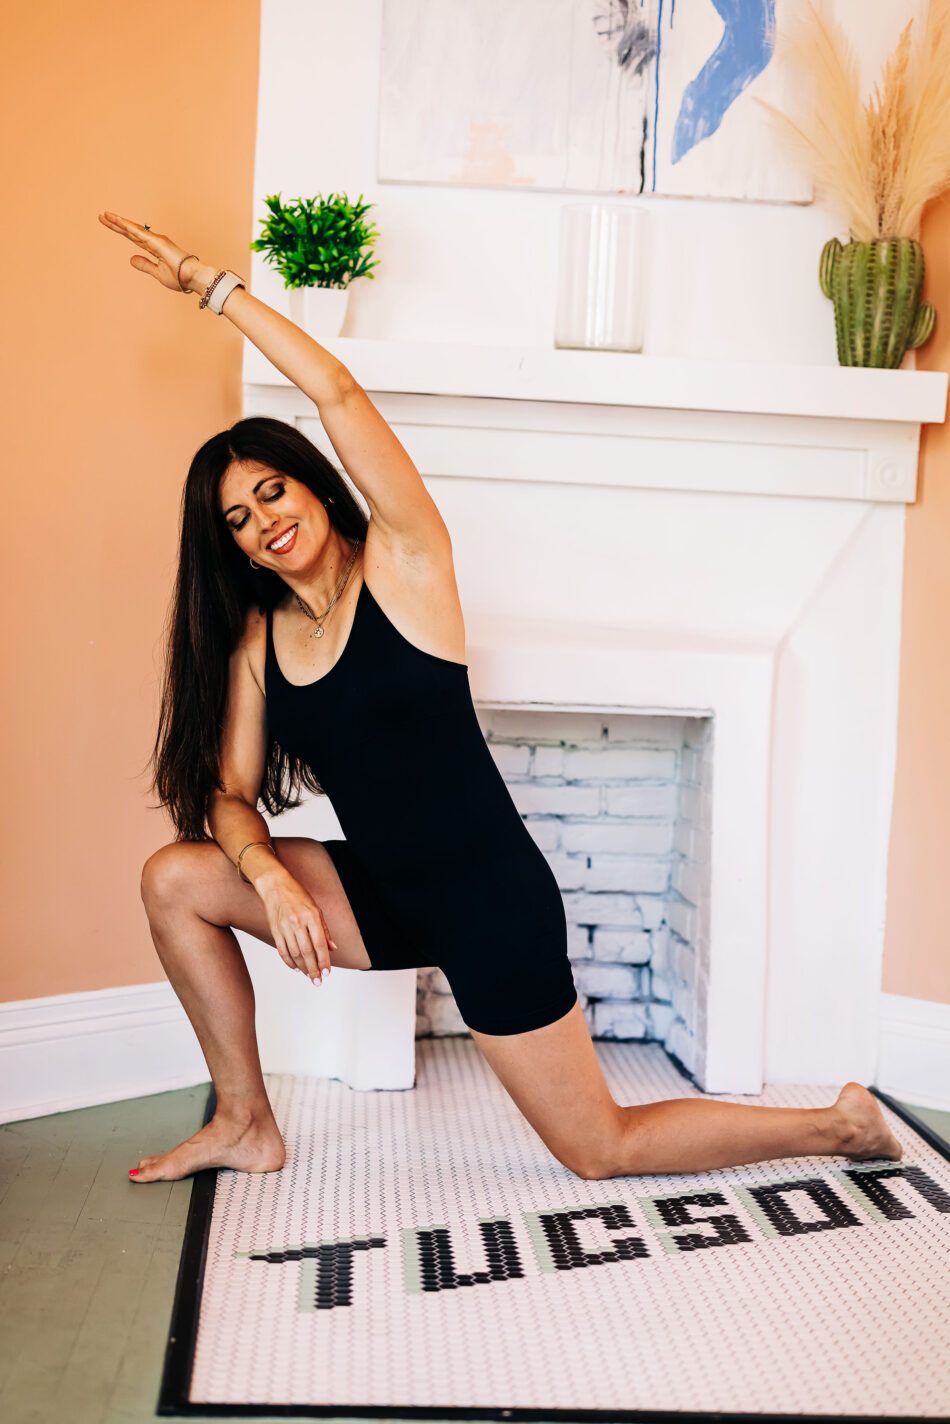
Sharing a roundup of some of my favorite functional stretches to add to your routine. Hi friends! How are ya? I hope you had a great weekend! We had an amazing date night at Locale, I caught a hot yoga class, worked on Vitality (we start TODAY! last call!), and we met up with friends…
The post My favorite functional stretches appeared first on The Fitnessista.

Sharing a roundup of some of my favorite functional stretches to add to your routine.
Hi friends! How are ya? I hope you had a great weekend! We had an amazing date night at Locale, I caught a hot yoga class, worked on Vitality (we start TODAY! last call!), and we met up with friends for dinner and drinks. I hope you had a lovely one, too!
For today, I wanted to chat a bit about functional stretching and share some of my faves. I know that stretching can be a fan fave, or something people loathe, but I think that it can be helpful to incorporate functional stretching (that makes sense for your activity level and lifestyle!) into your routine.

My favorite functional stretches
Why is functional stretching important?
Functional stretching, also known as dynamic stretching, involves moving your body through a range of motion to improve flexibility, mobility, and muscle activation. This type of stretching is different from static stretching, where you hold a position for an extended period. Functional stretching offers a range of benefits that are particularly relevant to physical activities and sports performance.
Here are some key benefits:
Improved Range of Motion:
Functional stretching involves dynamic movements that mimic the motions you’ll use during physical activities. This helps improve your joints’ range of motion in a way that’s relevant to your chosen sport or exercise.
Enhanced Flexibility:
Dynamic stretching helps increase the flexibility of your muscles and connective tissues by actively stretching and lengthening them through movement. This can contribute to better overall flexibility.Warm-Up for Activity: Functional stretching is often used as a warm-up before engaging in more intense physical activities. It gradually increases blood flow to your muscles, which helps prepare them for the demands of your workout or sports.
Activation of Muscles:
Dynamic stretching engages and activates the muscles you’re about to use. This can help improve muscle coordination and responsiveness, leading to better performance and reduced risk of injury.
Improved Blood Flow:
As you move through dynamic stretches, blood circulation to your muscles increases. This brings oxygen and nutrients to the tissues, enhancing their readiness for physical activity.
Injury Prevention:
Dynamic stretching with controlled movements and proper form helps improve joint stability and can reduce the risk of muscle strains and injuries during exercise. When you’re taking a muscle through the full and correct range of motion, it can help to prevent altered movement patterns, and imbalances that can lead to injury.
Neuromuscular Coordination:
Functional stretching promotes communication between your muscles and nervous system, enhancing coordination and control over your movements.
Sports Performance:
Dynamic stretching is especially effective for sports that involve explosive movements, such as sprinting, jumping, or agility exercises. It helps prepare your body for the specific actions involved in your sport.
Time-Efficient:
Functional stretching can serve as both a warm-up and a form of flexibility training, saving you time compared to performing separate warm-up and static stretching routines.
Mental Focus:
Engaging in dynamic stretching requires mental focus and body awareness, helping you mentally prepare for your workout or activity.
Postural Alignment:
By incorporating dynamic movements that challenge your balance and coordination, functional stretching can contribute to improved posture and alignment.
Versatility:
Dynamic stretches can be tailored to fit various activities, making them adaptable to your specific fitness goals and preferences.
Remember to start with controlled movements and gradually increase the intensity as your body warms up. Always perform functional stretching with proper technique and listen to your body to avoid overstretching or straining.
****A good rule of thumb: try functional stretching BEFORE your workout as part of your warm up, and static stretching AFTER your workout. You can do foam rolling either before or after your workout.
My 8 favorite functional stretches
Here is a short video with all of the stretches below!
Wall chest stretch
The wall chest opening stretch is a simple yet effective exercise to stretch and open up the muscles in the chest, shoulders, and upper back. It’s particularly beneficial for individuals who spend a lot of time sitting at a desk, hunched over a computer, or engaging in activities that can lead to rounded shoulders and a tight chest.
Instructions:
Find a Wall: Stand facing a wall with your feet about hip-width apart. Make sure you have enough space to comfortably extend your arms to the sides.
Position Your Arms: Raise your arms to shoulder height and extend them out to your sides, parallel to the floor. Your palms should be facing forward, and your fingers spread out.
Engage Your Core: Gently engage your core muscles to maintain stability and proper posture throughout the stretch.
Place Your Hands on the Wall: Press your palms and the length of your forearms against the wall at shoulder height. Your elbows should be slightly below shoulder level and about 90 degrees.
Gently raise your arms: This will encourage a gentle opening of the chest and shoulders. Your weight should be evenly distributed between both feet.
Lower back to start: You should feel a gentle pull across the chest and front of the shoulders.
Make sure to take deep breaths and keep your ribs down during this exercise.
Yogi squat to stand
It’s a grounding and hip-opening pose that offers a range of benefits, including improving flexibility in the hips, ankles, and groin, as well as promoting better digestion and relieving tension in the lower back
Here’s how to perform the yogi squat:
Instructions:
Start from Standing: Begin by standing with your feet about hip-width apart. You can place a yoga mat or blanket on the floor for added comfort.Position Your Feet: Slowly start to bring your feet closer together, gradually turning your toes slightly outward. The outer edges of your feet should be parallel to the edges of your mat.
Bend Your Knees: Begin to lower your hips by bending your knees. Your goal is to lower your hips towards the ground while keeping your heels on the floor. If your heels lift off the ground, that’s okay – work with the flexibility you have.
Bringing Your Hands to Prayer: As you lower into the squat, bring your hands together in a prayer position at your chest. Press your elbows against the inside of your knees, gently encouraging them to move outward. This action helps to open up the hips.
Engage Your Core and Lengthen Your Spine: Keep your spine long and your chest lifted. Engage your core muscles to support your posture.
Gently Press Your Elbows Against Your Knees: Use your elbows to press against the inner sides of your knees. This helps to open your hips further and create space.
Relax and Breathe: Take slow, deep breaths in this position. Allow your hips to gradually relax and sink lower if possible.
Stand back and sit into the squat to make this an active stretch.
Kneeling hip flexor stretch to hamstring stretch
The kneeling hip flexor stretch is a dynamic stretch that targets the muscles at the front of your hips, particularly the hip flexors. This stretch can help alleviate tightness in the hip flexor muscles, improve hip mobility, and contribute to better posture. It’s commonly used in warm-up routines, cool-down sessions, and as a postural correction exercise.
Here’s how to perform the kneeling hip flexor stretch:
Instructions:
Start in a Kneeling Position: Begin by kneeling on a soft surface, such as a yoga mat or carpet. Your knees should be hip-width apart, and your feet should be pointing straight back.
Engage Your Core: Gently engage your core muscles to stabilize your spine and maintain good posture throughout the stretch.
Step One Leg Forward: Take one leg and step it forward, creating a 90-degree angle at the knee. Your knee should be directly above your ankle, and your foot should be flat on the ground.
Find a Balanced Stance: The back knee remains on the ground, and the top of your foot rests on the mat. Ensure that your hips are squared and facing forward.
Pelvic Tilt: Tilt your pelvis slightly forward by tucking your tailbone under. This action helps to accentuate the stretch in the hip flexor of the back leg
Lean Forward Gently: While maintaining a tall spine, gently lean forward from your hips. You should feel a stretch along the front of the hip and thigh of the back leg.
Avoid Overarching: Be mindful not to arch your lower back excessively. The focus is on the stretch in the hip flexor, not on straining your lower back.
Tilt your hips back and extend your front leg as much as possible for a hamstring stretch: Keep your spine long and back flat. Bend your front knee to return to start.
Switch Sides: Release the stretch and return to the kneeling position. Repeat the stretch on the opposite side by stepping the other leg forward.
Tips: Keep your movements controlled and avoid any sudden jerks. Make sure both feet are well-supported with the top of the back foot on the ground. If you have knee issues, consider placing a cushion or folded yoga mat under your back knee for additional support.
Spinal twist – open and close
The spinal twist, also known as the seated spinal twist or Ardha Matsyendrasana in yoga, is a rejuvenating and gentle twist that helps improve spinal mobility, release tension in the back, and promote digestion. This twisting motion involves rotating the upper body while keeping the hips grounded, creating a stretch through the muscles along the spine.
Here’s how to perform the spinal twist with the additional chest and shoulder opener.
A supine spinal twist is a yoga pose that helps stretch and release tension in the muscles along the spine, particularly in the lower back, hips, and shoulders. It also offers a gentle twist to the spine, which can aid in spinal mobility and relaxation.
Here’s how to do a supine spinal twist:
Instructions:
Start in a Supine Position: Lie down on your back on a comfortable surface, such as a yoga mat or a soft carpet. Extend your legs straight out and let your arms rest by your sides, palms facing down. Take a few deep breaths to relax and center yourself.
Bend Your Right Knee: Draw your right knee toward your chest. Keep your left leg extended and grounded on the mat.
Cross Your Right Knee Over: Gently guide your right knee across your body toward the left side. Aim to bring your right knee as close to the ground as possible. Your hips will naturally lift slightly off the ground, and that’s okay.
Open Your Arms: Extend your right arm out to the right side, in line with your shoulder, palm facing up. Your left arm can either rest on your right knee for a gentle pressure or be extended out to the left side, creating a “T” shape with your arms.
Turn Your Head: If it’s comfortable for your neck, turn your head to the right, in the opposite direction of your bent knee. You can adjust the position of your head to find the most comfortable stretch for your neck and spine.
Relax and Breathe: As you settle into the twist, focus on your breath. Inhale deeply to lengthen your spine, and as you exhale, gently guide your knee closer to the ground. Avoid forcing the stretch; let gravity and your breath do the work.
Open and close: Bring your right arm across your torso to the left side of your body. Open back up to the “T” position and feel the opening in your chest and shoulders. Keep your shoulders down on the floor or mat.
Switch Sides: Extend your right leg back to the mat and repeat the same sequence on the left side, bending your left knee and guiding it across your body while keeping your right leg extended.
Cobra
Cobra Pose, also known as Bhujangasana in yoga, is a backbend that targets the muscles of the spine, chest, shoulders, and abdomen. This pose is often included in yoga sequences as a way to open the front of the body, strengthen the back muscles, and improve flexibility. It’s particularly beneficial for improving posture and relieving tension in the upper body.
Here’s how to perform Cobra Pose
:Instructions:Start by Lying Down: Begin by lying on your stomach on a comfortable surface, such as a yoga mat. Your legs should be extended straight back and your feet together, with the tops of your feet pressing into the mat.
Position Your Hands: Place your hands flat on the mat beside your shoulders, fingers spread wide and pointing forward. Your elbows should be close to your body.
Engage Your Core: As you prepare to lift into the pose, engage your core muscles by gently drawing your belly button toward your spine. This will provide support for your lower back.
Inhale and Lift: Press into your hands, slowly lifting your head, chest, and upper abdomen off the mat. Keep your pelvis and legs grounded. Use your back muscles to initiate the lift, rather than pushing with your arms.
Keep Your Elbows Bent: As you lift, your elbows should remain slightly bent, creating a gentle opening in the chest. Avoid locking your elbows.
Lengthen the Neck: Extend the crown of your head forward while keeping the back of your neck long. Avoid straining your neck by looking up too much.
Gaze Forward or Slightly Up: Depending on your comfort level, you can keep your gaze forward or slightly upward. Avoid tilting your head too far back.Stay in the Pose: Hold the pose for a few breaths, enjoying the stretch along your spine and the opening in your chest.
Exhale and Lower: As you exhale, gently lower your chest and head back down to the mat. Release your hands from the mat and rest your forehead on the mat. Repeat 10-15 times.
Lying active hamstring stretch
The lying hamstring stretch is a simple yet effective exercise that targets the hamstring muscles, which run along the back of your thighs. This stretch helps improve flexibility in the hamstrings, increase range of motion in the hips, and promote better posture. It’s commonly used to warm up before physical activity or to cool down after a workout.Here’s how to perform the lying hamstring stretch:
Instructions:
Start by Lying Down: Begin by lying on your back on a comfortable surface, such as a yoga mat. Extend your legs fully along the floor.
Bend One Knee: Bend your right knee and bring it toward your chest.
Grip Behind the Thigh: Reach your hands behind your right thigh and gently interlace your fingers. Your hands should be supporting the back of your thigh, close to your knee.
Straighten the Leg: Slowly start to straighten your right leg upward while holding onto the back of your thigh. Keep your knee slightly bent if needed to avoid overstretching.
Engage Your Core: As you hold your leg in the air, gently engage your core muscles to stabilize your pelvis and lower back.
Flex Your Foot: Flex your right foot, pointing your toes toward the ceiling. This will help intensify the stretch in your hamstring.
Lengthen Through the Heel: Imagine you’re extending your right heel toward the ceiling, keeping your leg straight while still holding onto the back of your thigh.
Bend and straighten: Bend your right leg and then extend it back up towards the ceiling with your foot flexed. Repeat 10-15 times. Feel the gentle stretch along the back of your right leg.
Switch Sides: Release your right leg and place it back on the floor. Switch to the left leg and repeat the same stretch.
Figure 4 stretch
The Figure 4 Stretch, also known as the Piriformis Stretch, is a yoga-inspired stretch that targets the muscles of the hips and glutes, particularly the piriformis muscle. This stretch helps alleviate tightness and discomfort in the hips and lower back, and it can be particularly effective for individuals who experience sciatic nerve pain. The stretch resembles the shape of the number “4,” which is why it’s called the Figure 4 Stretch.
Here’s how to perform the Figure 4 Stretch:
Instructions: Start by Lying Down: Begin by lying on your back on a comfortable surface, such as a yoga mat. Bend your knees and place your feet flat on the floor.Cross One Ankle Over the Opposite Knee: Lift your right foot off the mat and cross your right ankle over your left knee, creating a shape similar to the number “4.” Your right knee should be pointing outward.
Thread Your Arms Through: Reach your hands between your legs and gently thread your arms through the “hole” created by your crossed legs. Interlace your fingers behind your left thigh, holding onto the back of your left thigh.
Gently Pull Your Left Leg In: As you hold onto your left thigh, gently pull your left leg toward your chest. You should feel a stretch in your right hip and glute area, particularly the piriformis muscle.
Flex Your Right Foot: Flex your right foot to protect your knee and deepen the stretch. This also engages the muscles around your ankle and calf.
Keep Both Shoulders on the Mat: As you pull your left leg toward your chest, try to keep both of your shoulders grounded on the mat. Avoid lifting your upper body off the mat.
Straighten and bend: Take slow, deep breaths as you come out and back into the pose, making this an active stretch. Feel the gentle release of tension in your right hip and glute area.
Release and Switch Sides: Repeat on the other side.
Side band walks
Side band walks, also known as lateral band walks, are a simple yet effective exercise for strengthening the muscles of the hips and thighs, particularly the glutes and hip abductors. This exercise can help improve hip stability, enhance lower body strength, and prevent potential knee alignment issues. Here’s how to perform side band walks:
Setup: Place a resistance band just above your knees. Stand with feet hip-width apart, neutral spine, and engaged core.
Movement: Step to the right, maintaining tension on the band. Follow with the left foot, keeping feet apart. Focus on engaging hips and thighs.
Form: Keep knees aligned with toes, avoid leaning, and maintain an upright upper body.
Breathing: Inhale while stepping to the side, exhale as feet come together.
Repetition: Perform a set 10 reps or steps to the right, then switch to the left.
Lateral lunges
Side-to-side lateral lunges are an excellent exercise for targeting the inner and outer thighs, hips, and glutes. This movement helps improve lower body strength, flexibility, and hip mobility.
Here’s how to perform side-to-side lateral lunges:
Starting Position: Stand up straight with your feet about hip-width apart.Keep your chest up, shoulders relaxed, and gaze forward.
Step to the Side: Take a step to the right side with your right foot, wider than your hips. Imagine you’re stepping out to perform a wide stance squat. As you step, shift your body weight to the right foot, keeping your left leg relatively straight.
Lunge Movement: As your right foot lands, bend your right knee and hip, pushing your hips back as if sitting into a chair. Keep your left leg extended, with your foot flat on the ground. Your left toes may naturally point slightly upward.
Depth of Lunge: Lower your body until your right thigh is parallel to the ground or until you feel a comfortable stretch along your right inner thigh and groin. Make sure your right knee is aligned with your right foot and not extending beyond it. Keep your chest up and core engaged.
Return to Center: Push off with your right foot to return to the starting position, bringing your feet back together.
Switch Sides: Perform the same movement to the left side. Take a step to the left with your left foot, bending your left knee while keeping your right leg extended.
Repetitions: Repeat the side-to-side lateral lunges for the desired number of repetitions or alternate sides (which is my preferred method!)
Lunge with chest opener
A lunge with a chest opener combines a traditional lunge exercise with an upper body stretch to open up your chest and shoulders. This exercise helps improve lower body strength and flexibility while also addressing upper body mobility.
Here’s how to perform a lunge with a chest opener:
Starting Position:
Stand with your feet together and your arms by your sides.Take a moment to engage your core muscles and maintain a neutral spine.Step into a Lunge:
Take a step forward with your right foot, ensuring that your right knee is directly above your right ankle. Lower your body into a lunge position, with your right thigh parallel to the ground or slightly below. Your left leg will be extended behind you.
Chest Opener:
While in the lunge position, raise both arms out to the sides at shoulder height. Your palms should be facing forward. Gently squeeze your shoulder blades together and allow your chest to open up.
Stretch and Breathe:
As you open your chest, focus on taking deep breaths. Inhale to expand your chest and exhale to relax into the stretch.
Return to Starting Position:
Lower your arms back down to your sides and push off with your right foot to return to the starting position. Stand up straight with your feet together.
Switch Sides:
Repeat the same sequence, this time stepping forward with your left foot and lunging on the opposite side.Open your chest again as you maintain the lunge position.
Repetitions:
Perform the lunges with chest openers for the desired number of repetitions on each side.
So, tell me, friends: do you warm up before your workouts? What’s your strategy? Let me know if you try any of the exercises above! If you’re looking for workouts that you can do anywhere that are phased to get your stronger, leaner, and keep your motivation mojo going with new workouts each month, try Fit Team for free here.
Thanks so much for stopping by the blog today and I’ll see ya in the am with a fashion post!
xo
Gina
The post My favorite functional stretches appeared first on The Fitnessista.


