
When most people talk about building an impressive physique, they often envision capped delts the size of bowling balls, a massive chest, and chiseled abs. But what about the muscles you don’t see from the front? Having an impressive back is paramount when trying to develop an aesthetic physique. A V-shaped torso with a well-built … Read more
The post The 8 Best Upper Body Pulling Exercises appeared first on Breaking Muscle.

When most people talk about building an impressive physique, they often envision capped delts the size of bowling balls, a massive chest, and chiseled abs. But what about the muscles you don’t see from the front?
Having an impressive back is paramount when trying to develop an aesthetic physique. A V-shaped torso with a well-built back is an athletic and eye-catching look. And what about overall performance? The lower back, glutes, and hamstrings — collectively known as the posterior chain — provide a strong support and power base.

This is why most people should spend more time pulling. These different muscles of the back have different roles which respond better to diverse stimuli., so you’ll miss certain parts if you only do one or two pulling exercises. Here are the eight best upper body pulling exercises for a complete back.
Best Upper Body Pulling Exercises
- Seated Cable Row
- Meadows Row
- Inverted Row
- Chest-Supported Row
- Face Pull
- Banded Dumbbell Pullover
- Banded Pull-Up
- Barbell Back Extension
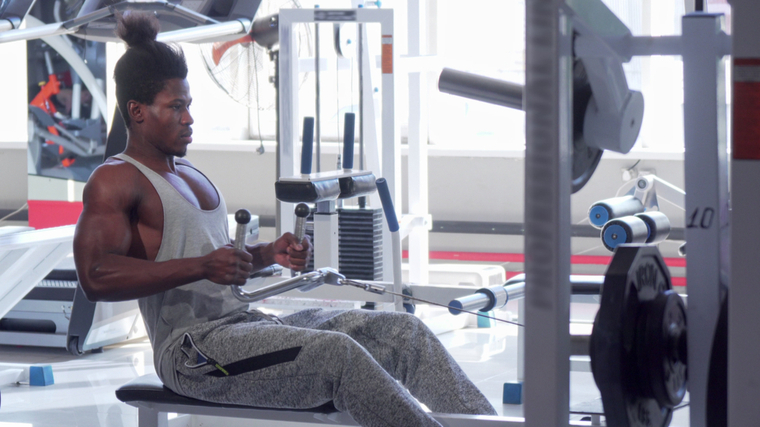
Seated Cable Row
When most people think about targeting the lats, they usually picture a vertical pulling motion, like pull-ups or pulldowns. Yet, a properly executed seated cable row is one of the best exercises to emphasize the lats while minimizing involvement from other back muscles. Plus, you can eventually use a ton of weight.
Use a low pulley station and a neutral (thumbs-up), close-grip handle for this movement. The neutral grip combined with keeping your elbows close to your body helps focus on the lats and increase muscle recruitment. (1) Compared to a barbell row, the arms, lower back, and legs are less involved, allowing you to focus even more on the target muscle(s).
How to Do the Seated Cable Row
Sit at the low pulley station and grab the handle with a thumbs-up grip. Push your legs into the support platform while keeping a neutral spine. In the starting position, your knees should be slightly bent, and your chest puffed out (this helps to engage your upper back muscles for stability).
Imagine your hands are mere meaty hooks and pull hard with your elbows, without rounding your spine. The handle should nearly reach your abs in the peak contraction, and your elbows should be slightly behind your body.
Lower the weight slowly and let it stretch your back as far as possible, even letting the scapulae (shoulder blades) come forward. This extreme stretch is one way to hit the lats, trapezius, and rhomboids. (2) When lifting and lowering the weight, be mindful not to let the lower back round and not swing your upper body to cheat the weight with momentum.
Benefits of the Seated Cable Row
- The seated cable row allows potentially heavy loading, encouraging long-term progress.
- It reinforces strong posture by requiring upper-body control and spinal stabilization, while strengthening the upper back.
Meadows Row
This exercise is named after the late bodybuilding coach John Meadows, who popularized the movement. It uses a barbell landmine rather than a dumbbell and focuses on the upper back muscles — the lower traps, rhomboids, and even the rear delts. But don’t worry, it still works the lats as well.
The leverage of the landmine and the angle of movement allow for a unique stretch of the recruited muscles, which develops muscle mass.
How to Do the Meadows Row
Stand on one side of a landmine station in a staggered stance with slightly bent knees. Use your front leg as a support for the same-side arm. Keep your spine flat and remain bent at the waist. Use lifting straps to grab the barbell sleeve with a pronated (palm-down) grip. Because the sleeve is smooth and thick, the lifting straps will prevent grip strength from being a limiting factor.
Lift the weight by driving hard with your elbow. To emphasize the upper back, allow your elbow to flare out, rather than staying pinned to your ribs. Keep your torso flat, not rotated. Maximize the range of motion by using smaller 25-pound or 10-pound plates instead of 45-pound plates.
Benefits of the Meadows Row
- This unique row trains the upper back and lats with minimal lower back strain.
- As a unilateral exercise, it corrects strength imbalances and improves overall muscle development.
Inverted Row
This simple bodyweight exercise being “underestimated” is an understatement. Some hardcore gym-goers refuse to engage in bodyweight exercises once they get a taste of iron, but the inverted row is a fantastic exercise for any lifter.
Not only does it work the whole upper back and arms, but it also gives your lower back a rest. (3) It’s simple, effective, and can be easily adapted to any strength level or goal. Too hard? Set the bar higher or bend your knees. Too easy? Slip on a weighted vest and/or elevate your feet on a bench.
How to Do the Inverted Row
Position a stable bar (often a Smith machine) around waist height. The lower the bar, the harder the exercise will be because the more bodyweight you’ll be lifting. Lie under the bar and grab it using a slightly wider than shoulder-width grip, either pronated (palm-down) or supinated (palm-up). Squeeze your shoulder blades together and pull yourself up until your chest touches the bar.
Lower yourself with control. To reap the most benefits, keep your body as tight as possible. Contract your glutes and abs, and keep your entire body straight throughout each rep. Don’t let your scapulas move around as you stretch at the bottom. Let’s stay tight and work on core stability.
Benefits of the Inverted Row
- The inverted row will build total-body strength and stability because the body must be stabilized during the exercise.
- It improves scapular strength and health, which benefits posture.
- It’s relatively easier than a pull-up, so it’s an excellent place to start with bodyweight pulling exercises.
- For a bodyweight exercise, it targets the upper back more than the pull-up.
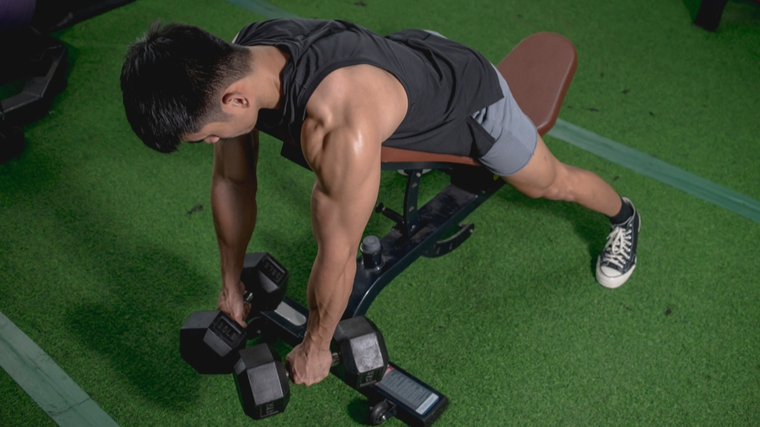
Chest-Supported Row
If you’re an older lifter or anyone who’s suffered injuries over the years, chances are you’ve tweaked your lower back at some point, and the mere reading of this article is making your spine itch. Well, do not fret. There’s a heavy-duty exercise that won’t bug your lower back.
Even if you don’t have back problems, the chest-supported row is valuable. It prevents any form of cheating and won’t tax your spinal erectors, which leaves them fresh for your squats and deadlifts. There’s minimal chance of shifting the stress of the exercise onto the wrong muscles.
How to Do the Chest-Supported Row
Some gyms are equipped with a machine specially designed for this exercise. Otherwise, use an incline bench and set it at around a 45-degree angle. Lie against the bench with your chest at the very top and your head above.
Assume a stable position with your feet and brace your core. You won’t be moving your body during the lift, apart from your arms and shoulder blades. Grab a pair of dumbbells or kettlebells and start rowing, driving your elbows up hard. Squeeze as hard and high as you can, then slowly lower the weight to a full stretch.
To emphasize the lats, use a neutral-grip (palms facing each other) and keep your elbows close to your body. For more upper back involvement, assume a pronated grip (palms down) and let your elbows go to the sides.
Benefits of the Chest-Supported Row
- This chest-supported row has no lower back involvement, which prevents back pain and fatigue.
- The strict movement prevents momentum and cheating. You only work the desired muscles and the perfect technique is reinforced.
- It works the lats, lower traps, and rhomboids.
Face Pull
Do you know what can put a roadblock between you and your goals? Injuries. The body needs a strong, balanced foundation to perform and be healthy, but many people spend more time performing pushing exercises than pulling. This can open the shoulder joint to an increased risk of injury when the body’s internal rotators (chest, anterior deltoids, and lats) overpower the external rotators (rotator cuff and posterior deltoids).
Coupled with a lack of development of the shoulder blade stabilizers (like the trapezius and rhomboids), this can create muscular imbalances and persistent injuries. Enter the face pull. A favorite in performance-based strength circles, this exercise works all the neglected little muscles contributing to shoulder health. (4) It’s also a nice rear delt builder and targets the traps and rhomboids in a unique way.
How to Do the Face Pull
Clip a rope attachment to a pulley set around chest-level. Grab the rope with your thumbs facing you and pinkies facing away. Extend your arms, keeping a slight bend in your elbows, and step back until the weight plates are slightly lifted.
Bending your knees for stability, flatten your spine, and puff out your chest. Pull the weights to your forehead-level. Each hand should end up on the side of your face (hence the name). Pause for a second in the contracted position, then slowly lower the weight back to its initial position.
Avoid flexing your arms using your biceps, but instead pack your shoulder blades together and pull with your elbows. Your arms will bend naturally. If you’re a bodybuilding enthusiast, think about performing a “back double biceps” pose.
Benefits of the Face Pull
- This cable movement works the upper back, rear delts, and rotator cuff.
- It’s very efficient at improving shoulder health and promoting joint longevity.
- It’s equally useful at improving posture, especially kyphosis in the thoracic spine (being slouched over).
Banded Dumbbell Pullover
The pullover is a classic exercise, older than the sport of bodybuilding itself. However, its main target muscle has been the subject of debate for just as long. Is it an exercise for the chest or the back? It actually works both, according to science and experience. (5)
Biomechanically, the lats are main arm extensors of the arms and shoulders, but the chest (and long head of the triceps) also contribute to that movement in certain ranges of motion. If you perform the exercise in a back workout, especially with your lats already pumped and fatigued, you’ll certainly feel them working.
The added band compensates for the lack of gravity-induced tension in the top position of the exercise. This allows more time under tension and muscle growth because the exercise now delivers both a great stretch and a hard contraction.
How to Do the Banded Dumbbell Pullover
Lie on a flat bench with the top of your head at one end, your upper body fully supported, and your feet planted on the ground. Do not lie sideways across the bench like some lifters perform the movement. Place a dumbbell on the ground behind your head. Attach one end of a resistance band to the dumbbell and the other end of the band to a stable rack, extremely heavy dumbbell, or have a partner hold it in place.
Grab the dumbbell with the palms of your hands on the underside of the weights around the handle. Place the dumbbell over your head with slightly bent arms. Don’t let your glutes leave the bench as lower the weight behind your head into a deep stretch.
Pull it back to the starting position against the band tension. Do not actively bend your elbows because it will shift the workload off the back and onto the triceps.
Benefits of the Banded Dumbbell Pullover
- The pullover targets the lats, chest, and shoulders.
- The movement can help to build your mind-muscle connection for the lats.
- The deep range of motion provides a great stretch upper body which improves thoracic (upper back) and shoulder mobility.
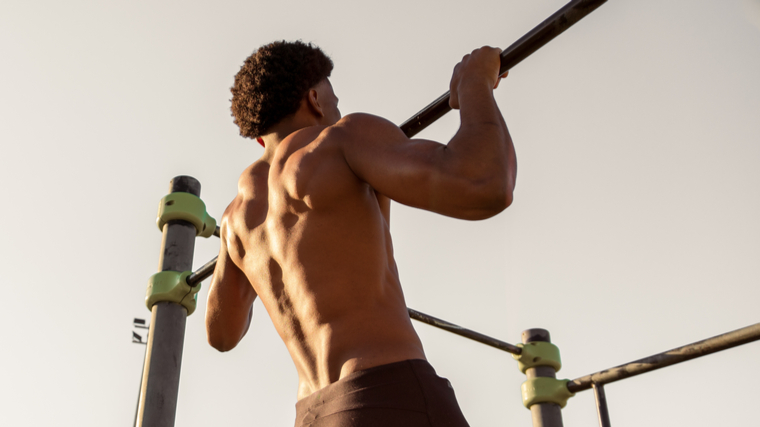
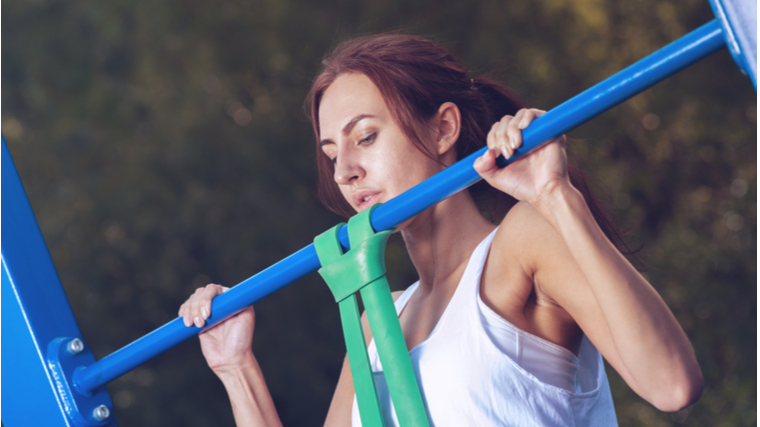
Banded Pull-Up
The pull-up might be a staple exercise for back development, but can you do more than a few? And can you do enough of them with perfect form? Enter the resistance band.
A light resistance band allows you to squeeze your muscles harder, because it offers slight help, and it allows you to really focus on feeling the lats. It’s easier on the joints as well because shoulder joint stress is reduced in the bottom position, where the band offers the most help.
For the muscle-focused lifter, it has another advantage. Compared to a lat pulldown, the pull-up involves movement at your lower body, which recruits a lot of core work for stability. (6) Now, unless you’re freakishly strong, an experienced gymnast, or a calisthenics aficionado, chances are you lack some control over your lower body during the pull-up.
This can make it less efficient for back development. The band takes care of this and guides you upwards like you’re on a rail. This provides more control and improves the mind-muscle connection with your back.
How to Perform the Banded Pull-Up
Secure a resistance band on top of a rack and stretch it down so you can step into it. The resistance of the band should allow you to complete 10-15 reps before muscle fatigue. Grip the bar palms-down, slightly wider than your shoulders. Keep your elbows in front of your body and start pulling yourself up.
It’s crucial that you keep an arched chest and not let it collapse by rolling your shoulders forward — this would shift the stress of the movement from the back muscles to the shoulder joints, possibly causing injuries. Think about leading with your chest to the ceiling. Lower yourself to a dead-stop hang for maximum stretch.
Benefits of the Banded Pull-Up
- The pull-up is one of the most efficient back-building exercises that activates multiple muscles in the back.
- The resistance band allows the lifter to focus more on the back involvement and less on total body rigidity.
- The band’s assistance allows beginners to perform pull-ups and experienced lifters to perform high-rep pull-ups in a fatigued state.
Barbell Back Extension
We’re keeping the best for last. At least, the most underrated back exercise there is. Every gym bro is eager to pummel their lats and traps. But the vast majority discard lower back training. It’s treated as an afterthought, a muscle group sufficiently stimulated by lower body exercises, or it’s simply avoided because of an already aching spine.
But what many fail to understand is that the lower back is arguably the most important muscle group in the body, along with the other core muscles. It supports our spine — the center of our entire musculoskeletal system. Having a weak spinal region is like having a tree with a soft trunk.
Research has shown that people with back problems simply had less spinal muscle mass and strength. (7) Having a strong lower back will make you stronger, healthier and more resilient overall. (8)
Also, a muscular lower back (called a “Christmas tree” in bodybuilding circles) is just impressive-looking and aesthetic. The back extension also strengthens your glutes and hamstrings, and can drive up your deadlift and squat to unprecedented levels.
How to Do the Barbell Back Extension
Be sure to warm-up thoroughly and practice proper form at all times. Adjust a 45-degree back extension bench so that the top of the pad is just below your waist. Secure your ankles in the ankle pads and place your thighs on the upper pads, while keeping the legs straight.
Hinge forward at the hips and grab a barbell with a palms-down grip. Keep your arms straight and your spine neutral from your tailbone to your neck. Flex your abs and pinch your shoulder blades together. Lift the weight by squeezing your glutes until your entire body is in a straight line.
Don’t allow the weight to rest on the ground in the bottom position. Perform controlled reps and do not jerk the weight. If the position hurts the back of your knees, set the waist pad a bit higher and point your toes slightly out.
Benefits of the Barbell Back Extension
- The back extension builds the entire posterior chain: your lower back, glutes, hamstrings, as well as working the lats and upper back statically as stabilizers.
- The movement is one of the best exercises for building and maintaining a healthy and strong spine.
- It has tremendous carryover to squats, deadlifts, and strength in general.
The Back Muscles
The back is a complex array of several muscles, and one should know their purposes and apply different strategies for each part as they respond better to certain stimuli. Unfortunately, some muscles of the back are unknown or neglected by many lifters, which can lead to imbalances or suboptimal performance. Here are the most important back muscles.
Latissimus Dorsi
This is the largest muscle in the upper body, and one of the strongest. Commonly known as “the lats”, they play a key role in spine and arm movements. They help extend and stabilize the spine and, with the help of their little brother, the teres major, they move the arm downward. They also help to move and rotate the shoulders.
The lats are “the” pulling muscle. Whenever you’re pulling with your arms — during pull-ups, pulldowns, or rows — they are involved in some way, but humerus depression (when your upper arms are brought towards your ribs) is what will really hit them. This is why the cue of “pulling with your elbows” is so efficient to target the lats.
Trapezius
The trapezius is another one of the strongest muscles in the body. It goes from the middle of the spine to the bottom of the cranium, and laterally across both scapulae (shoulder blades).
It is made of three distinct parts with each serving a different function on the scapulae: the upper fibers are used for elevation, the middle fibers retract the scapulae, and the lower fibers depress it. Whenever your shoulder blades are engaged, the traps are, too.
When most people say that they are working their “traps,” they usually mean working the upper section while performing shrugs (scapular elevation). For overall back aesthetics and strength, you should also address the medium and lower fibers.
Posterior Deltoids
This relatively small muscle, one-third part of the larger shoulder muscle, the posterior (or rear) deltoids run from the upper side of the scapula to the humerus bone on the back of the arm.
Their main functions are to rotate the arm externally, extend the arm, and bring it down alongside the body. Neglecting this muscle will result in “sloped,” hunched-over shoulders. But more importantly, the rear deltoids are important for shoulder health and stability.
Rhomboids
Along with the teres, trapezius, and posterior deltoids, the rhomboids create “the upper back.” These muscles work together in an overlapping function to control scapular movement. The rhomboids particularly work to rotate, elevate, and retract the scapulae.
Erector Spinae
The erector spinae, or spinal erectors, are a paired column of muscles running from the sacrum up to the base of the skull. It is possibly the most important muscle in your body (after the heart, of course) because it supports the base upon which all other bones, organs, and muscles are attached.
Along with the abdominal muscles, the diaphragm, and the pelvic floor, they form the “core muscles.” Any movement that engages the core or the spine in any way recruits the spinal erectors.
How Often Should You Train the Back
Your back is large and can handle a lot of work. Unfortunately, many people have an unbalanced workout routine and insufficient pulling work can result in postural problems and strength plateaus.
While you can hit the back, in some way, every day for health or performance goals, a proven hypertrophy (muscle-building) plan is to hit the back one to three times a week for a total of 12 to 20 working sets. For muscle growth, include the back in a pulling workout with the biceps, as part of an upper body session, or in a full-body workout.
Total volume-per-session should be adjusted depending on your split. If you target the back once a week, 10 to 12 sets should be enough, but if you hit it twice or thrice, the total work done each week can increase as you reduce the volume in each workout.
For instance you could do six or seven sets for the back, followed by other upper body muscles (chest, shoulders, triceps, and biceps) for two upper-body workouts per week. With a full-body approach done three times per week, six sets for the back in each session would work well.
How to Progress Your Back Training
The back is composed of many different muscles with different purposes, so you will have to adopt different strategies depending on your objectives. Larger muscles, like the lats, can progress faster than others. A prime mover is guaranteed to elicit more force than a more postural muscle.
Track your progress on the big compound exercises, and add weight (and/or reps) from week to week. The quality of execution is paramount, so keep the weekly weight jumps conservative, around five to 10 pounds.
Certain muscles will respond better to different rep schemes and techniques. The lats and the erectors grow well with pretty basic work with heavy weights and low to moderate reps. The rear delts and upper back muscles often respond better to a higher rep range (15-30 reps). The upper back muscles also benefit from increased time under tension with the use of mid-rep pauses, for instance.
The back as a whole can be a pretty difficult area to feel, so do not hesitate to use the “isolation sandwich technique” — doing a compound (multi-joint) exercise, followed by an isolation (single-joint) exercise, then another compound movement. This can be an efficient way to improve the mind-muscle connection.
How to Warm-Up Your Back
Warming-up both your upper back and lower back is a good way to minimize any potential injury risk. It’s also a good idea to warm-up your triceps, because many lat exercises put the triceps under a stretch and you want to avoid strains and tears. Grab a light resistance band and try this circuit:
- Band Pull-Apart: Take a resistance band with a palms-down grip, holding the band at arms-length in front of your body. Keep a slight bend in your arms while pulling both hands back in line with your shoulders. Pause when the band touches your chest before returning to the starting position. Perform 10 reps before moving to the next exercise.
- Scapular Pull-Up: Hang from a pull-up bar with an overhand grip and your arms straight, as if you were ready to perform a pull-up. Without bending your arms, pull your shoulder blades down and back. Your body will raise slightly. Think of doing a “reverse shrug”. Slowly let your scapulae come back up to a stretch. Perform 10 reps before moving to the next exercise.
- Iso-Hold Row: Loop the resistance band around a stable rack at chest-level. Grab it using a neutral (thumbs up) grip and step back from the rack. Pull the band with your elbows close to your body, until your hands are just under your chest. Don’t allow your shoulders to rise up. Once you reach the peak contraction, hold it for 15 seconds before moving to the next exercise.
- Band Triceps Pushdown: Attach the resistance band to a point over your head. Grab the band with a thumbs-up grip using both hands. Keep your elbows fixed at the sides of your body and bring your hands down by extending your arms until fully locked out. Return to the starting position, resisting the band tension. Only your forearms should move. Perform 20 reps before repeating the first exercise. Do this circuit a total of three times.
Building a Complete Back
You can’t just do one back exercise and call it a day. You have to use different angles and techniques to cover all the muscles of this complex region. These exercise options will allow you to create a workout that will ensure each back muscle is properly addressed, for a complete development without wasting your time by pummeling the same muscle group or ignoring others.
References
- Leslie, Kelly. L. M. BSc (Hons); Comfort, Paul MSc, CSCS*D The Effect of Grip Width and Hand Orientation on Muscle Activity During Pull-ups and the Lat Pull-down, Strength and Conditioning Journal: February 2013 – Volume 35 – Issue 1 – p 75-78 doi: 10.1519/SSC.0b013e318282120e
- Paine R, Voight ML. The role of the scapula. Int J Sports Phys Ther. 2013 Oct;8(5):617-29. PMID: 24175141; PMCID: PMC3811730.
- Fenwick CM, Brown SH, McGill SM. Comparison of different rowing exercises: trunk muscle activation and lumbar spine motion, load, and stiffness. J Strength Cond Res. 2009 Mar;23(2):350-8. doi: 10.1519/JSC.0b013e3181942019. PMID: 19197209.
- Niederbracht, Yvonne; Shim, Andrew; Sloniger, Mark; Paternostro-Bayles, Madeline; Short, Thomas. Effects of a Shoulder Injury Prevention Strength Training Program on Eccentric External Rotator Muscle Strength and Glenohumeral Joint Imbalance in Female Overhead Activity Athletes, Journal of Strength and Conditioning Research: January 2008 – Volume 22 – Issue 1 – p140 – 145. doi:10.1519/JSC.0b013e31815f5634
- Eduardo Borges, Bruno Mezêncio, Rafael Soncin. Resistance training acute session: pectoralis major, latissimus dorsi and triceps brachii electromyographic activity. Journal of Physical Education and Sport. Published June 2018. doi:10.7752/jpes.2018.02095.
- Hewit, Jennifer. A Comparison of Muscle Activation during the Pull-up and Three Alternative Pulling Exercises. Published 2018/11/02. Journal of Physical Fitness, Medicine & Treatment in Sports. doi:10.19080/JPFMTS.2018.05.555669
- Yaprak Y. The effects of back extension training on back muscle strength and spinal range of motion in young females. Biol Sport. 2013 Sep;30(3):201-6. doi: 10.5604/20831862.1047500. Epub 2013 Jul 22. PMID: 24744489; PMCID: PMC3944566.
- María Moreno Catalá, Arno Schroll, Gunnar Laube and Adamantios Arampatzis. Muscle Strength and Neuromuscular Control in Low-Back Pain: Elite Athletes Versus General Population. Frontiers in neuroscience. Published 03 July 2018. doi:10.3389/fnins.2018.00436
Featured Image: Paul Biryukov
The post The 8 Best Upper Body Pulling Exercises appeared first on Breaking Muscle.


